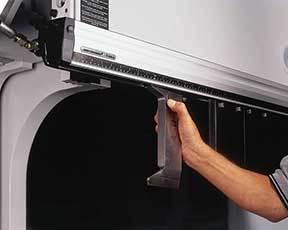
Tools and tool holders can also contribute to angular accuracy loss.

Tools and tool holders can also contribute to angular accuracy loss.
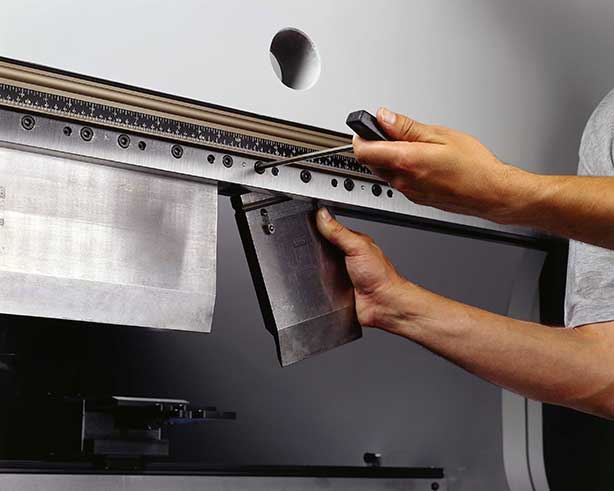
Tools and tool holders can also contribute to angular accuracy loss.

Tools and tool holders can also contribute to angular accuracy loss.
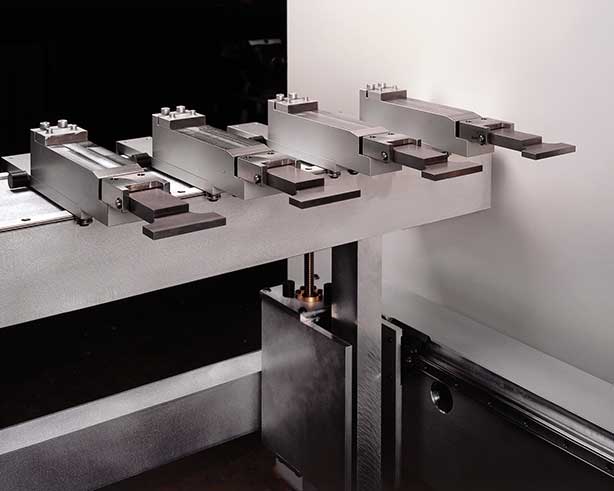
A common source of dimensional inaccuracy is the backgauge calibration.
A common source of dimensional inaccuracy is the backgauge calibration.
Blank size errors can also contribute to what could appear as press brake inaccuracies.
Blank size errors can also contribute to what could appear as press brake inaccuracies.
If you’re no longer getting the accuracy you need from your press brake, there could be several factors at play.
The most common source of angular inaccuracies is related to the press brake ram and bed. These components are easily damaged by overloading and can even suffer damage from the routine wear and tear of tool changing.
To check the condition of your press brake, simply run your finger down the load bearing surfaces of both the bed and ram to check for flatness. If you feel any imperfections (high spots, low spots, burrs, etc) you have likely identified a problem. As little as a 0.002 in. imperfection (about half the thickness of a sheet of standard copy paper) in this area can cause part angularity errors up to one degree.
In some cases, the bed and ram can be re-machined in place using special portable machining devices to correct this problem. More severe damage might require the removal of the components for repair. Also worth consideration are retrofittable tool holders that provide some adjustment capabilities to address bed and ram imperfections.
Tools and tool holders can also contribute to angular accuracy loss. In addition to the same overloading and wear issues suffered by the bed and ram, lower dies tend to pick up dimples from the set screws that clamp them in place, causing tool alignment errors.
All press brake tooling, no matter the make or style, can be bent from overloading. Gooseneck punches are especially subject to bending because of their offset dog leg. Bent tools not only cause angular errors, they can produce dimensional errors.
Inspect tools
Routine tooling inspections can help identify tool problems. Measuring tooling variations usually requires some type of surface plate for accuracy. Many fabricators keep and use worn tooling for less demanding applications. The challenge is to keep compromised tooling separated from good tooling.
The front to back alignment between the bed and ram is another area that might cause angular inaccuracies. Hem and flatten operations can result in misalignment between the bed and ram because of the excessive front to back loading caused by the flattening operation. A visual check is usually enough to spot gross errors. A more precise check requires feeler gauges between the punch and die set.
Backgauge calibration
The most common source of dimensional inaccuracies is the backgauge calibration. On many backgauges, the bar and stops are manually adjustable with no clear zero or reference point. The settings are, at best, estimations. To determine whether backgauge calibration is the problem area with your press brake, attempt to bend a test blank directly down the center. All measurements of the test part after bending should be symmetrical.
If measurements are not symmetrical, the cause of the problem might be elusive. Test bending in various places on the press brake might help identify the problem. The most likely source is that the backgauge bar is not parallel to the punch. Another common problem is that all backgauge stops are not of the same length.
Specific press-brake design components should also be assessed for performance issues. For example, on up-acting machines the treadle linkage tends to wear and must be adjusted much like the clutch adjustment in old cars. There should be about one inch of free play at the bottom position. This is verified by no movement on the pressure gauge when the treadle is near bottom.
The mechanical linkage between the depth-control hand wheel on the left of the machine and the stop valve in the center is composed of many pieces that must all be intact and moving freely. Problems in this area can be experienced as a rapid jump in force while dialing in a bend.
For end-to-end angular variations, the roller guiding system that levels the ram should be checked. The ram must be blocked and any backlash in the eccentric cams that adjust the rollers can be verified. Note this test is not for the novice and is best performed by a trained manufacturer’s representative.
Angular inaccuracies
The reasons for angular inaccuracies also vary with the style of press brake.
On mechanical-stop press brakes, there are two separate leveling systems, one during the bending stroke and one at the bottom of the stroke. The mechanical stops are checked for parallelism at the bottom of the stroke without power. The hydraulic leveling system is checked for parallelism at the bottom of the stroke under power.
On rocker-arm-style press brakes, the press drive contains many bearings and connections that open with use. If tightening the gibs improves performance on small parts, then excessive wear in the connections is likely.
With conventional open-loop hydraulic press brakes, heat and voltage variations effect accuracy even when the press brake is new. If performance variations appear to be time related — for example, first thing in the morning — heat and voltage variations are likely the cause. Constant temperature environments or routine warm up periods can minimize variations. A constant voltage supply, if available, can also improve accuracy.
Modern servo-hydraulic or double-bed referenced press brakes generally have self-healing ram-position controls. Heat, voltage, oil viscosity and pressure variations are all automatically compensated for. However, connections between the piston and ram can open up. This condition can be easily diagnosed by moving the ram in the up position and trying to slip a sheet of paper in the connection where the piston and the ram meet. Any clearance indicates loose or worn components. The fix might be as simple as tightening the bolts that hold the ram to the piston. Be aware that the bolts might have been stretched and not simply loosened. In this case, the bolts should be replaced.
The linear encoders for measuring ram positions and their guiding systems are fragile and can be easily damaged. Any bent or loose components, especially the guiding system for the reading head, should be very closely inspected. Accumulating errors, those that seem to get worse as the day progresses, usually indicate a damaged encoder or axis servo drive.
Sometimes the application itself causes the accuracy loss. The highest accuracy performance is achieved when the metal thickness times eight is equal to the V-die opening (T X 8 = V). The farther away from that sweet spot, the worse the performance is to be expected. When the metal thickness times five is equal to the V-die opening or less, severe accuracy loss can occur as well as permanent machine damage.
Also be aware that flat-blank size errors can attribute to what appears to be press brake accuracy problems. Many times the original blanks are sized incorrectly. The press-brake operator attempts to distribute the difference across all bends, so that critical dimensions are correct, even though some flanges are too long or too short. The skill required to perform this successfully is high and the opportunity for error is also high.
Although the upfront cost to do nothing about your inaccurate press brake is zero, your reoccurring cost in excessive set-up time, material scrap and unpredictable quality, makes the return on investment to repair decision a “no brainer.” The tough question is, should I repair or replace? Because it is almost always less expensive to repair a press brake than to replace it, your justification mainly depends on the capabilities needed.
Press brakes have extremely long life cycles; many will outlive us. If your current machine meets all your anticipated needs except for accuracy, repair it. If accuracy is only one of the many deficiencies, replace it. Most new press brakes not only have accuracies five times higher than most existing press brakes did when they were new, they also incorporate easy to use programming features and some even automatically change their own tooling.